I wanted to make an external battery pack but I didn’t want to use “dummy batteries” to connect it to the flash, I wanted a jack. Whenever I modify/make something I try to make it look as though it came like that from the factory, or could have. That was my goal for this, a clean install. I chose to mount the jack in place of the “bracket fitting,” which is next to the “external power source socket”. I don’t use flash brackets so I didn’t mind ditching the fitting. As far as I knew, no one had ever done this before so I had no idea if it would even fit, but I was confident I could make it fit. So I just started drilling…
Proceed at your own risk. Don’t blame me if you break something lol
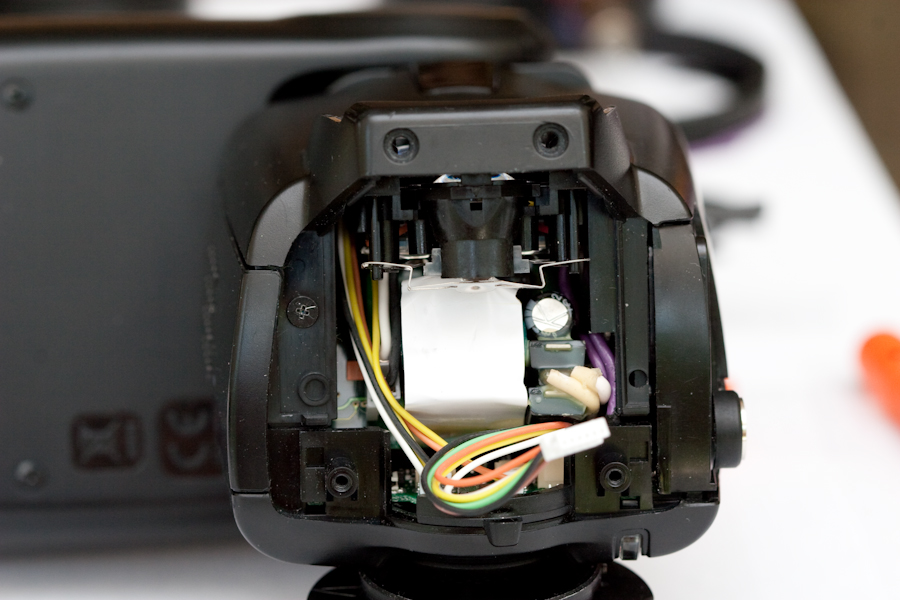
I don’t have photos of the disassembly process (sorry!) but it’s only a few screws. First, remove the batteries. On the bottom of the flash are four screws that hold the base on. Remove these then the foot assembly should lift off. Disconnect the little wire harness. Now, looking from above, rotate the flash head 90 degrees. You’ll see four screws, two on each side. I did this many months ago so I’m going by memory but I think you only need to remove the two on the front half of the flash body. With the screws out, the flash body is only held together with little clips/tabs along the seam. WIth the battery door open, work it apart. This part takes a little finesse but it will come apart.
With the flash apart, you can get to work. The external power source socket screws in from behind its mounting plate. You don’t have to remove it but I did just so that it was easier to work with while drilling and whatnot. The following pictures explain how I mounted the jack. Cut the wires for the jack longer than you think they need to be as it’ll make routing them easier. I’m not sure which gauge wire I used but it wasn’t as thin as 26 AWG, probably more like 20 or 22 stranded.

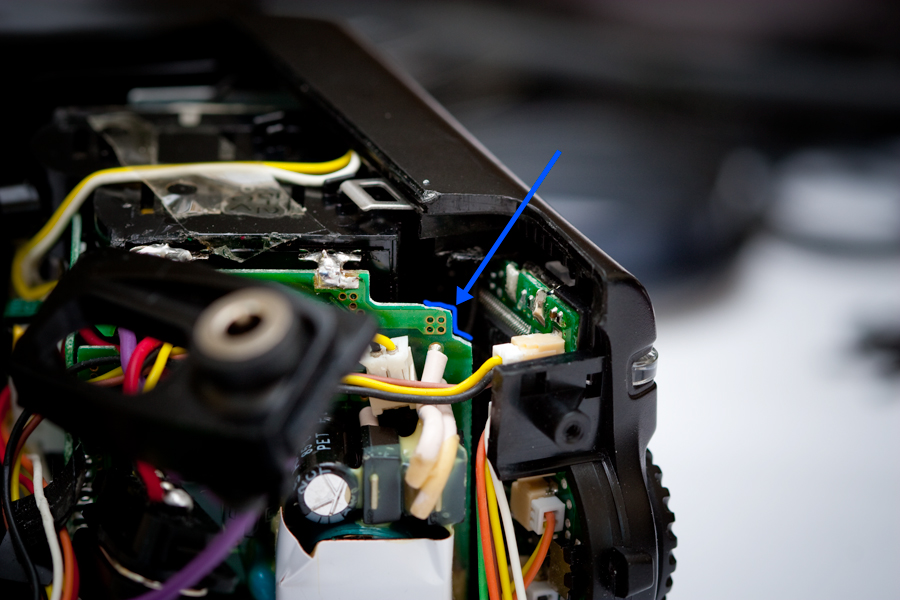
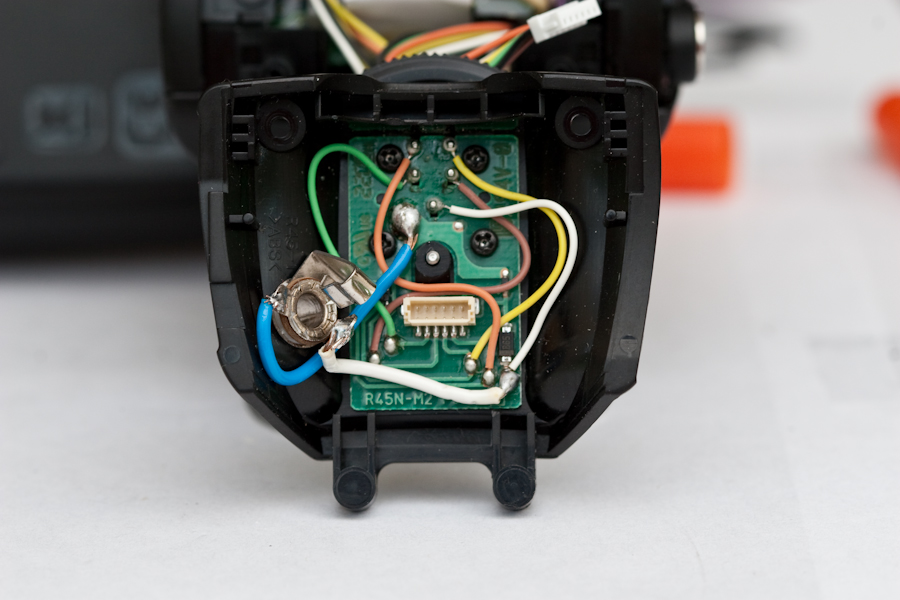
To make room for the jack I had to file down the corner of the pcb, which I marked in blue. As long as you don’t file across any copper traces, it’s perfectly fine.
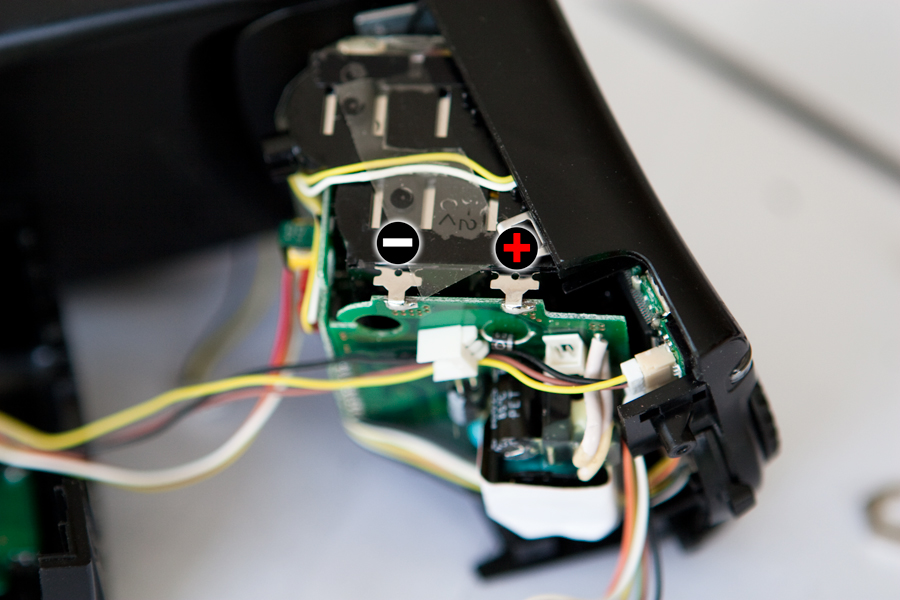
Solder the other ends of the wires to the appropriate battery tabs, as seen below, under the “+” and “-” markers. By appropriate, I mean make sure you stay consistent with your polarity; this jack should be wired the same as the jack on the battery pack and both ends of the cable need to be consistent.
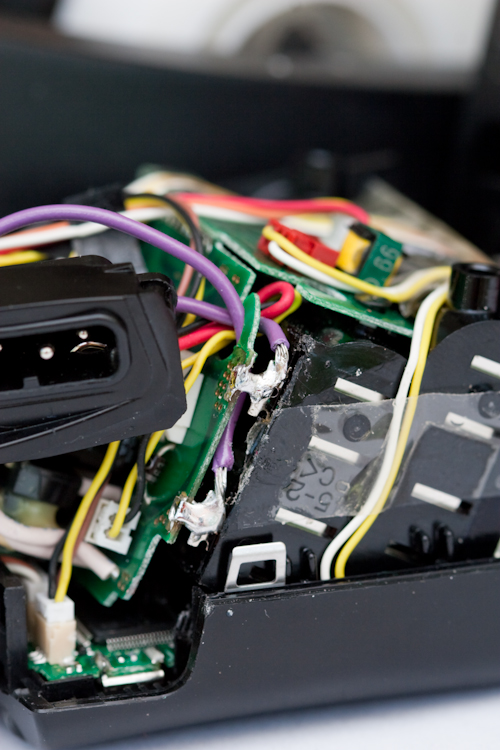
The hardest part of this project was routing the wires so that the flash could be put back together. The tolerances are very tight so you have little room for new wires.
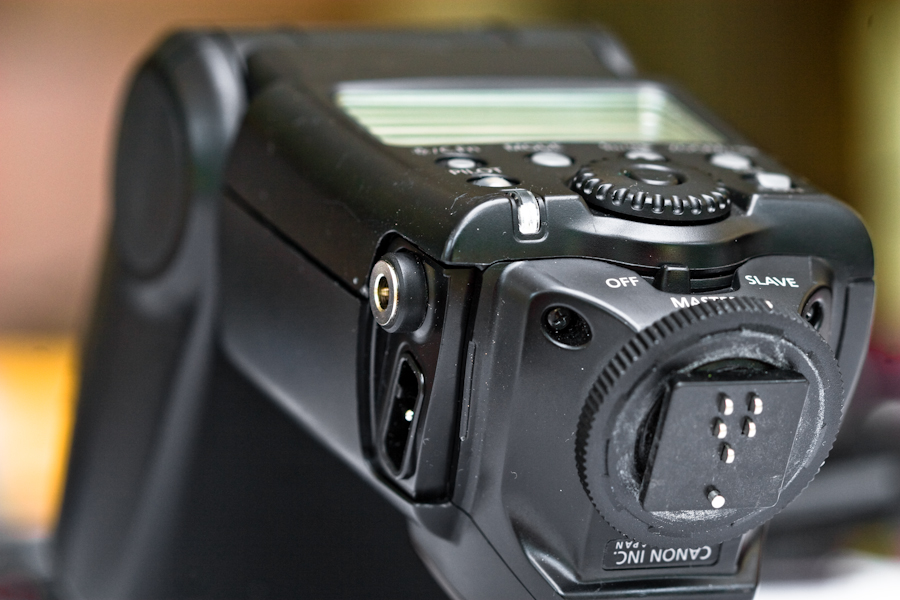
Since you have the foot assembly off, now is a good time to add a 1/8″ jack for a wireless trigger if you haven’t already. This is much easier. Just drill the hole for the jack and connect the wires as shown. Again, make sure this jack is wired the same as the jack on the trigger itself.
Here is the exterior, along with another flash I modded with a 1/8″ jack.

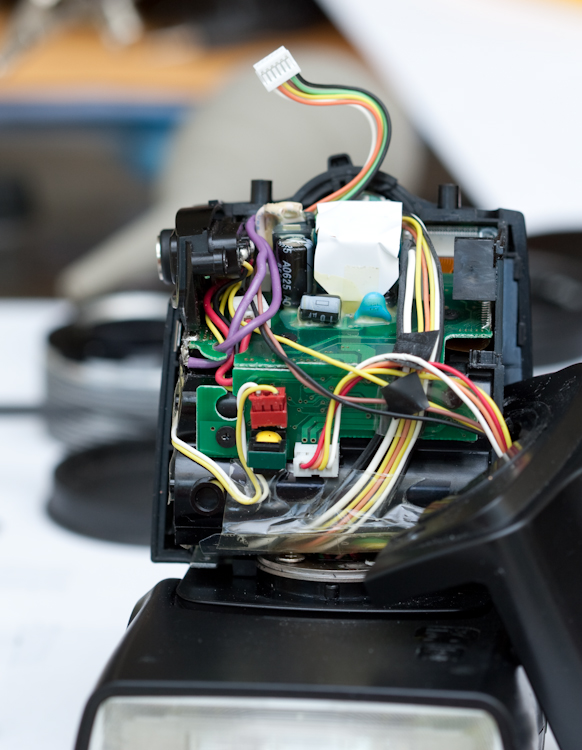
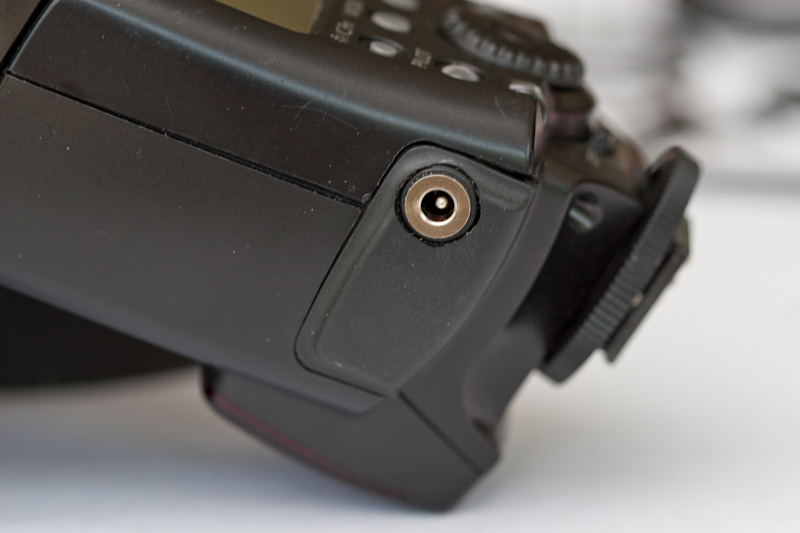
Getting the flash back together is a little tedious but just be patient. Be sure to attach the battery door before you start to reassemble everything. Once it’s back together, it should look something like this.
You can even reuse the rubber cover if you cut a hole in it, which gives it a cleaner look.
My next post will detail how to make the battery pack and cable that connects the pack to the flash. Stay tuned!

Leave a Reply